Guide · 2 min read
How to Convert PDF to JPG
The oMyPDF PDF to JPG tool turns each PDF page into a JPG, PNG or WEBP image — pick the resolution and pages, then download them all as a ZIP. Smaller PDFs are converted right inside your browser, so nothing leaves your device.
Quick overview
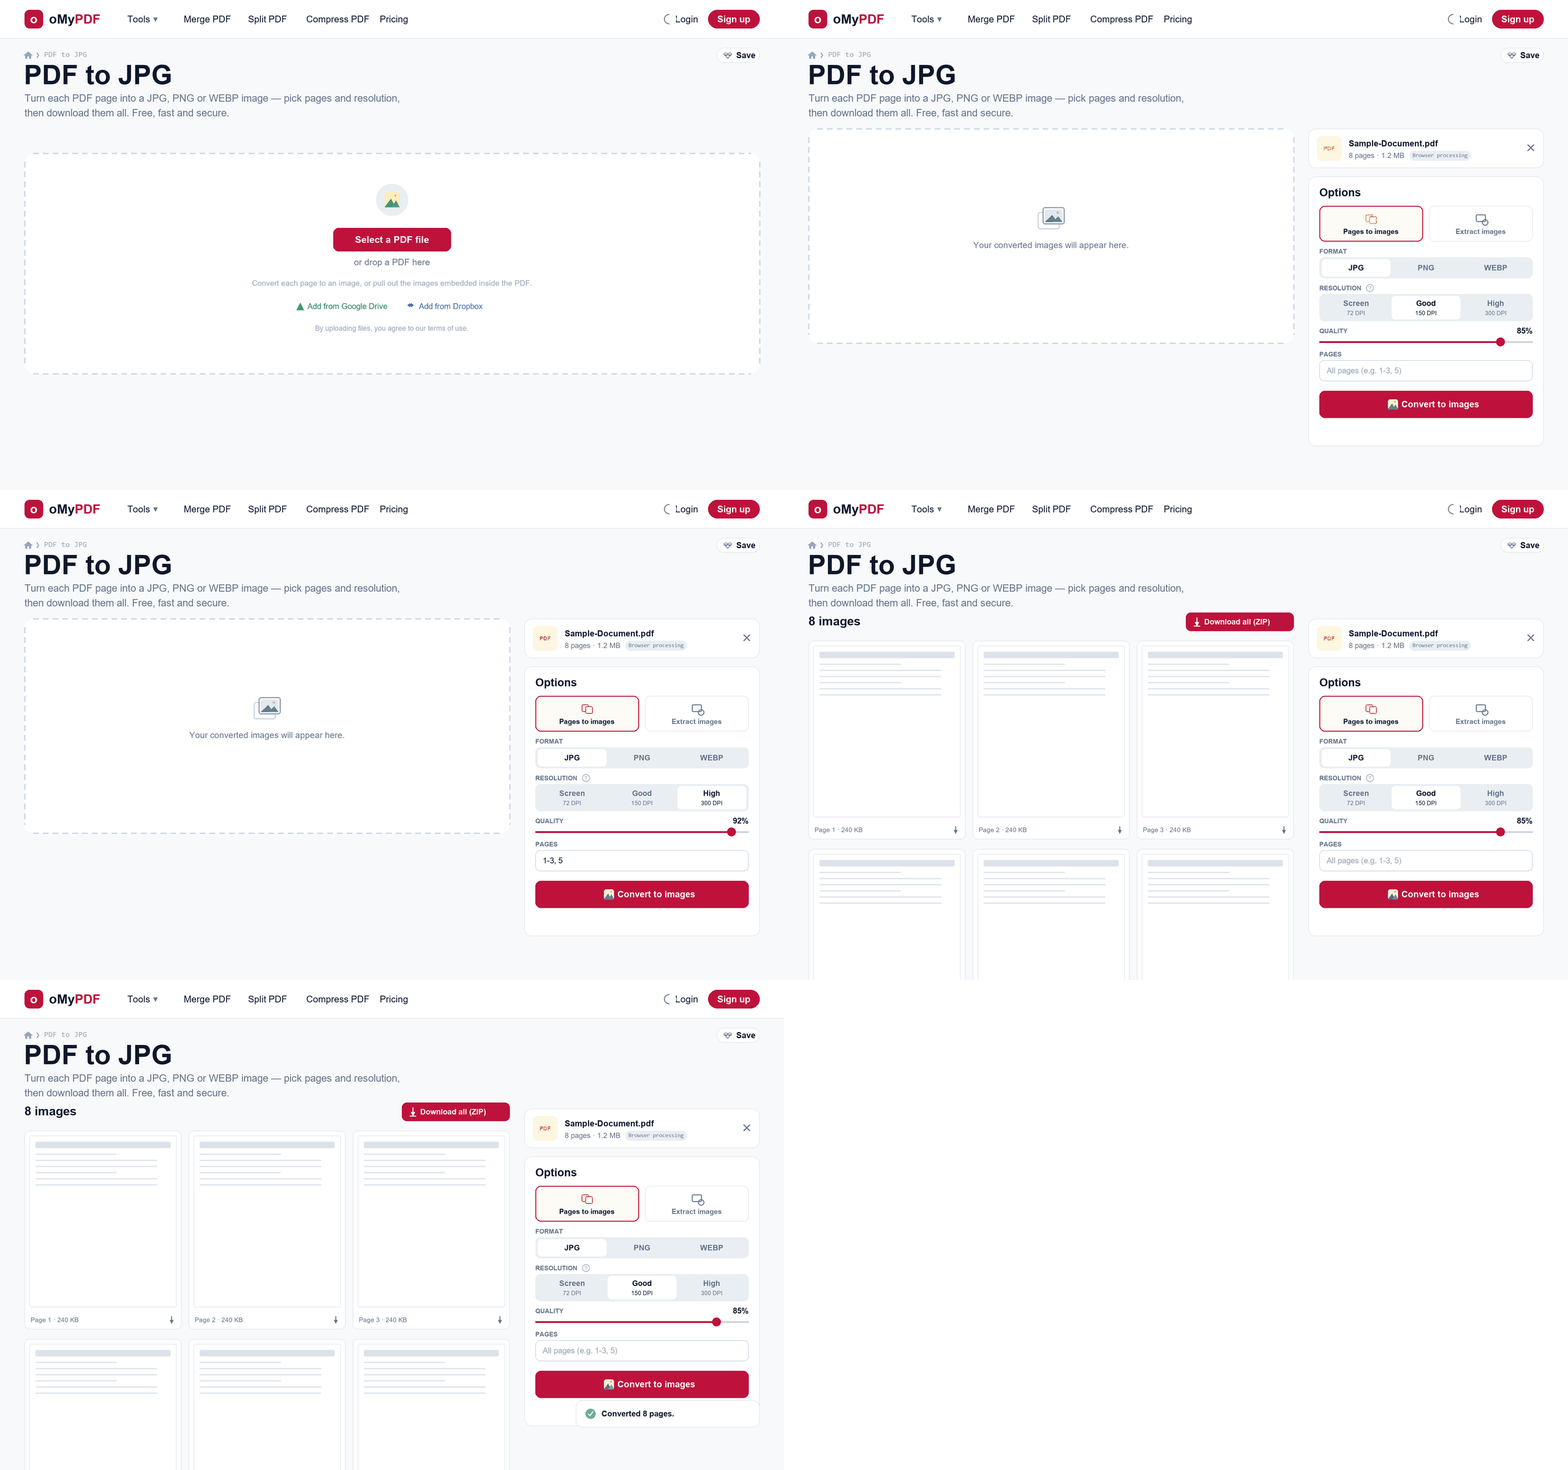
The full workflow: add a PDF, choose the format and resolution, convert, then download the images.
Step-by-step
- 1
Open the tool
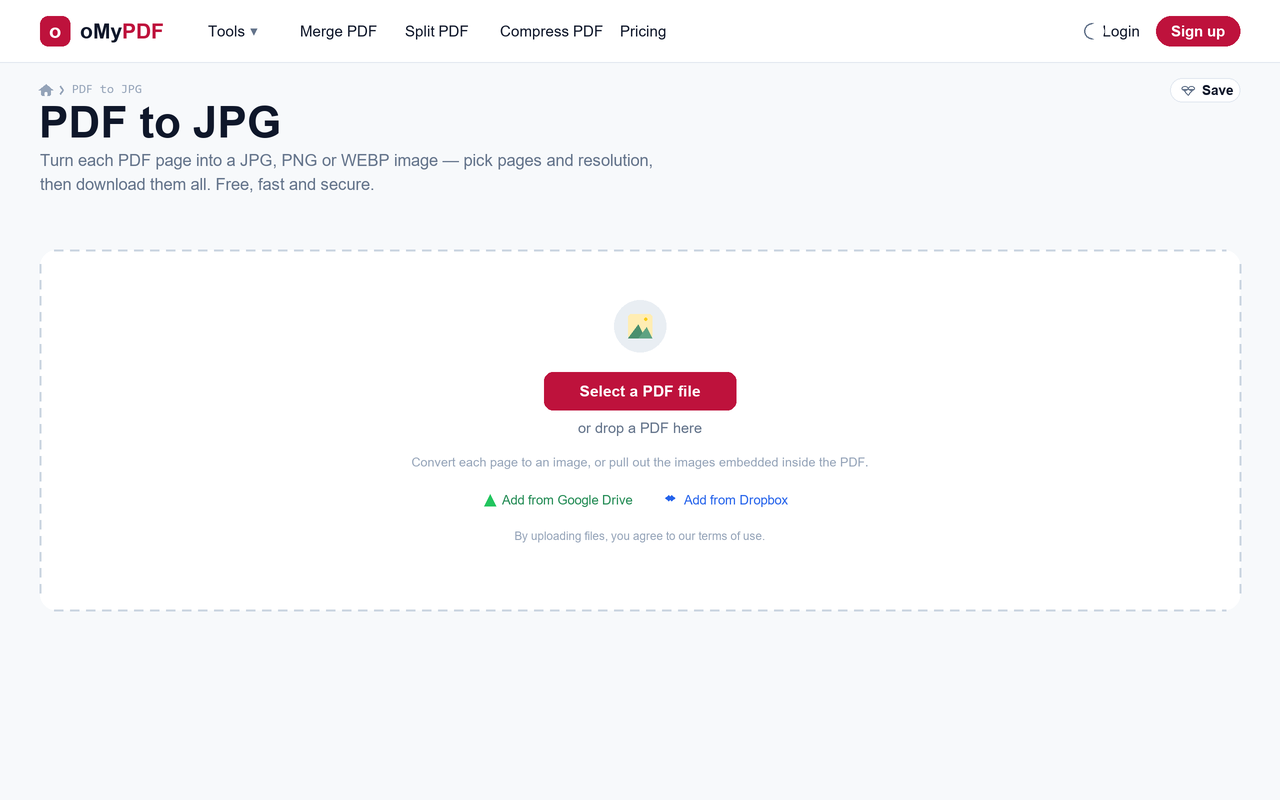
Go to the PDF to JPG page. Click Select a PDF file, or drag a PDF straight onto the upload area.
- 2
Choose the output & format
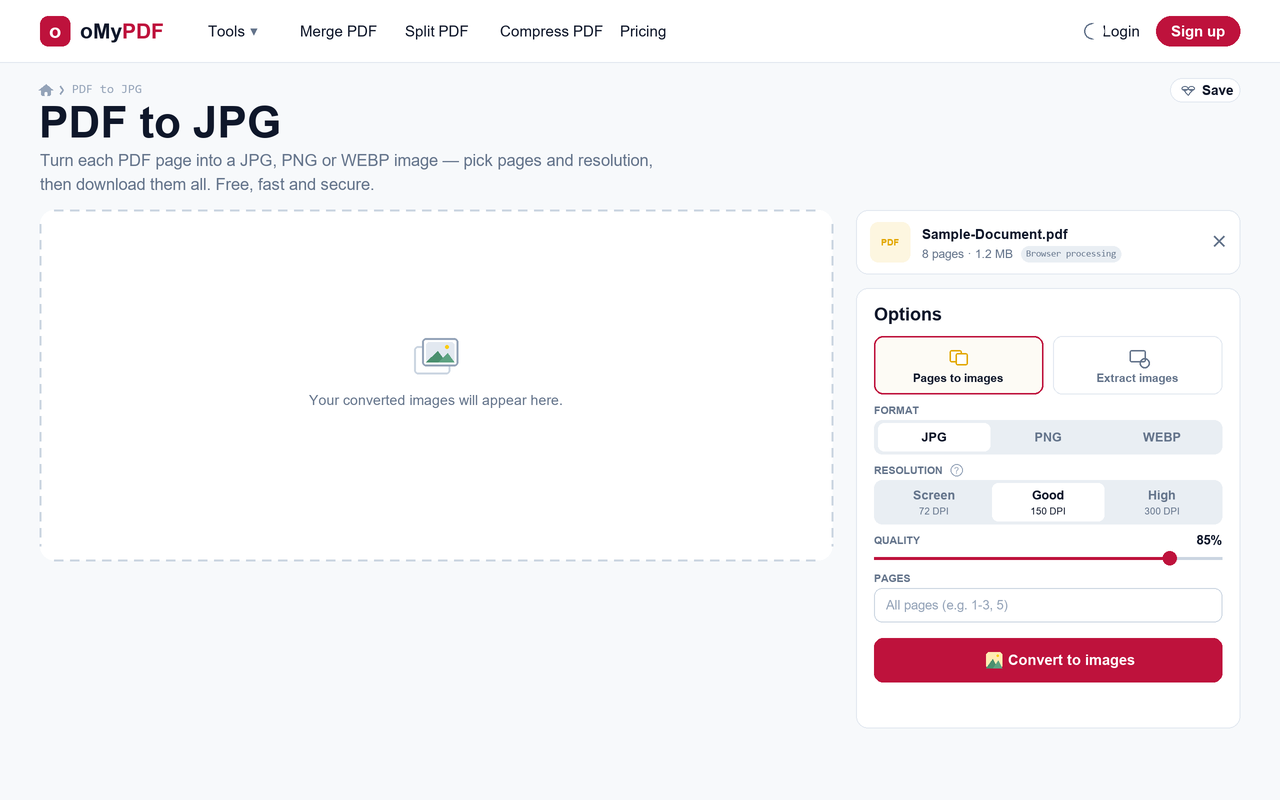
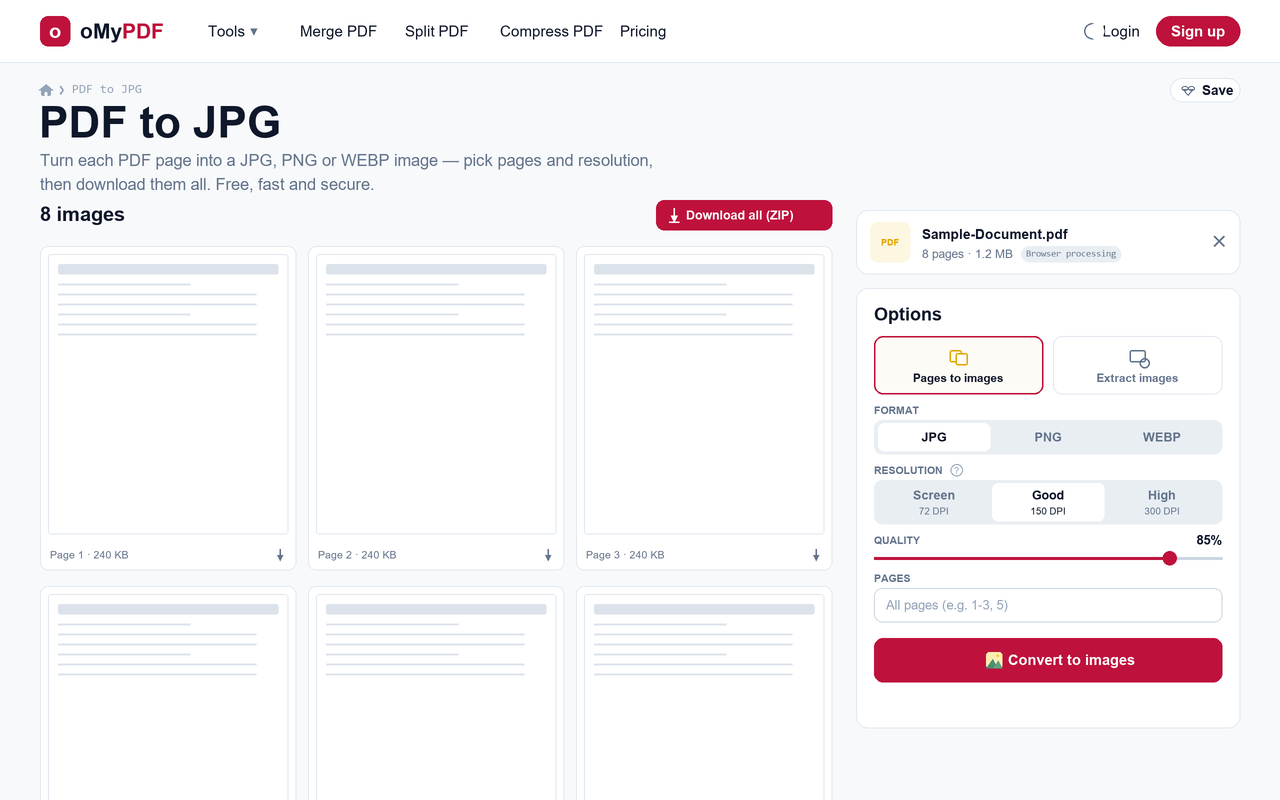
In Options, keep Pages to images to render each page as a picture (or switch to Extract images to pull out the images embedded in the PDF), then pick the format: JPG, PNG or WEBP.
- 3
Set resolution, quality & pages
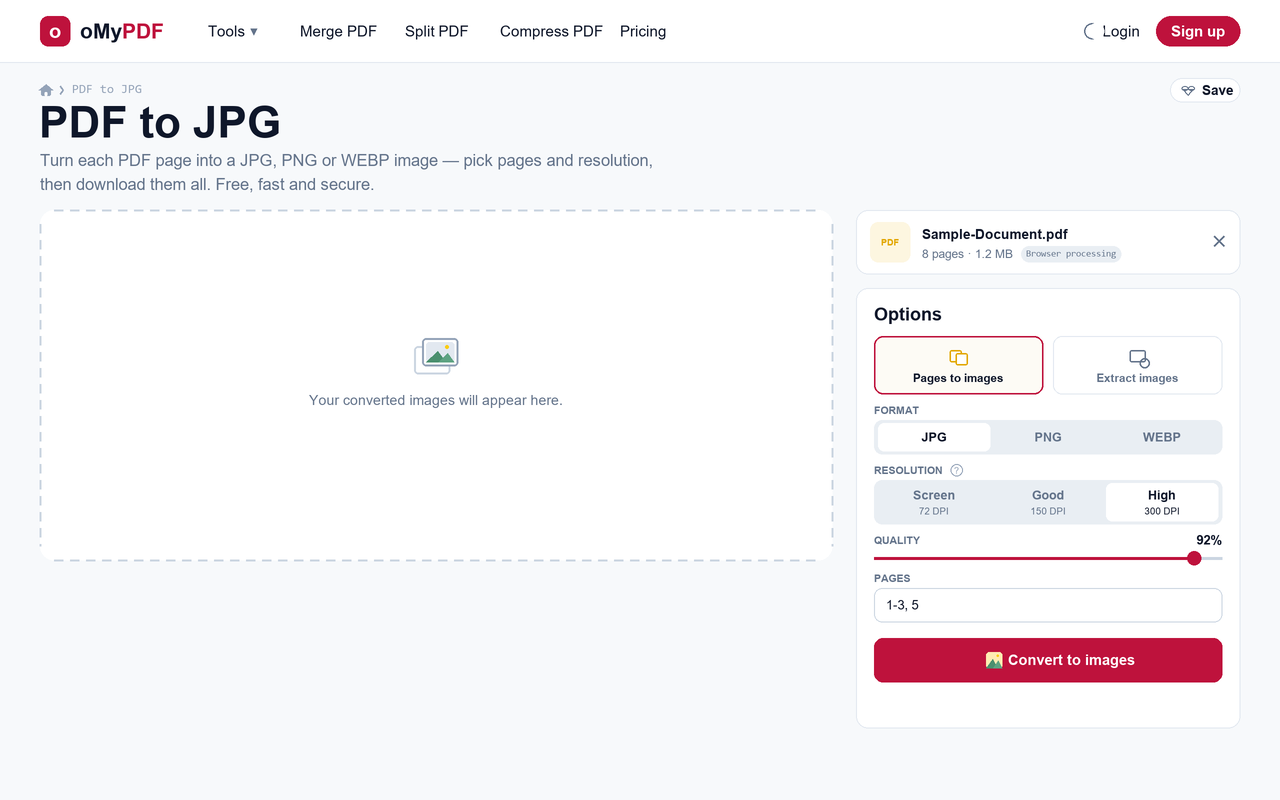
Choose a resolution — Screen (72 DPI), Good (150 DPI) or High (300 DPI) for print — adjust the quality slider, and optionally limit to specific pages like 1-3, 5. Leave Pages empty to convert them all.
- 4
Convert to images
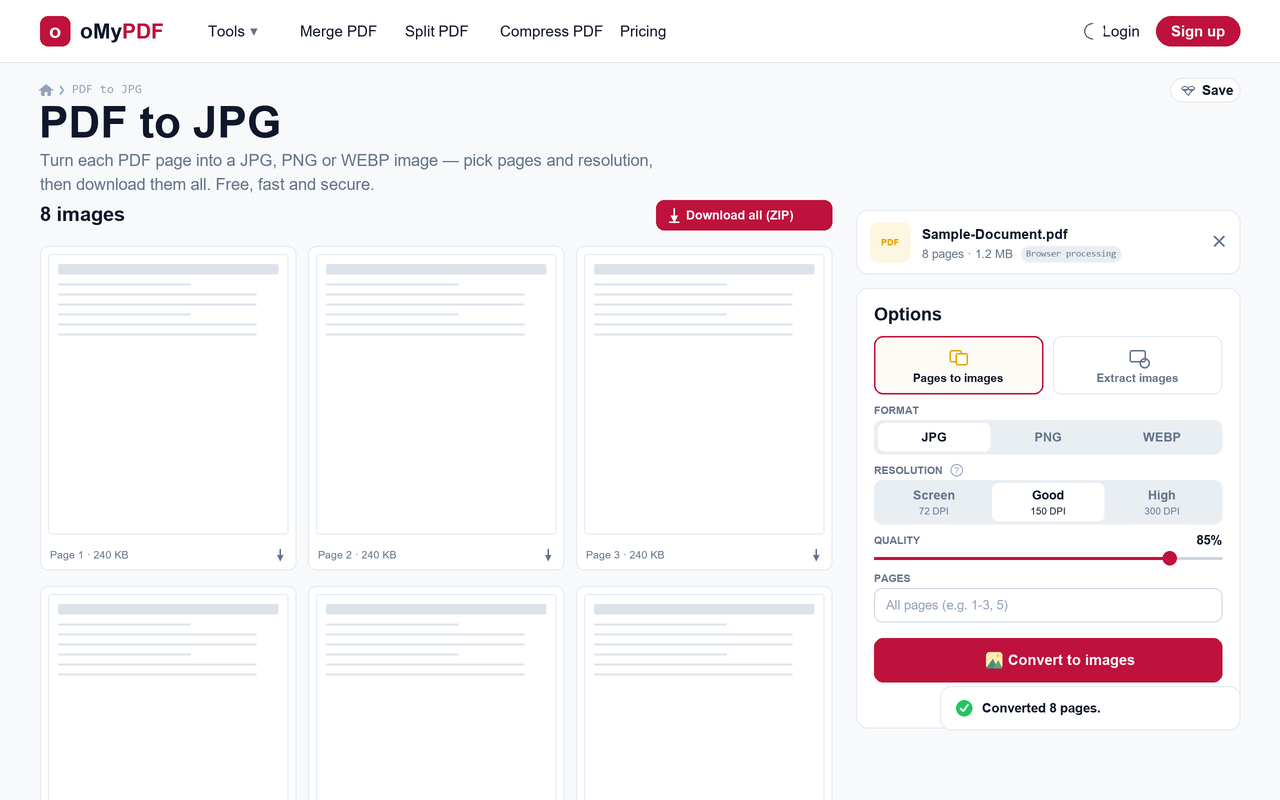
Click Convert to images. Each page is rendered and appears as a thumbnail with its size, so you can review them before saving.
- 5
Download your images
Download any image on its own, or click Download all (ZIP) to grab every page at once in a single archive.
Tips
- Two ways to convert: use Pages to images to render whole pages, or Extract images to pull out just the photos embedded inside the PDF.
- Pick the right resolution: Screen (72 DPI) is smallest for the web, Good (150 DPI) suits most uses, and High (300 DPI) gives print-quality, sharper images.
- Choose the format: JPG for small photo-like files, PNG for crisp text and transparency, or WEBP for the best size-to-quality balance.
- Stays private: smaller PDFs are converted right in your browser and never uploaded; large files use encrypted server processing and are deleted right after.
Ready to convert your PDF?
Free, private, and no sign-up required.