Guide · 2 min read
How to Use Watermark PDF
The oMyPDF Watermark PDF tool lets you add a text watermark to a PDF — or stamp your logo as an image watermark — with full control over opacity, rotation, and position, and a live preview. It runs right in your browser with no signup, so your file stays private and the output carries no oMyPDF mark.
Quick overview

The full workflow: add a PDF, design the watermark, set its position, then apply and download.
Step-by-step
- 1
Open the tool
Go to the Watermark PDF page. Click Select a PDF file, or drag a PDF straight onto the upload area.

- 2
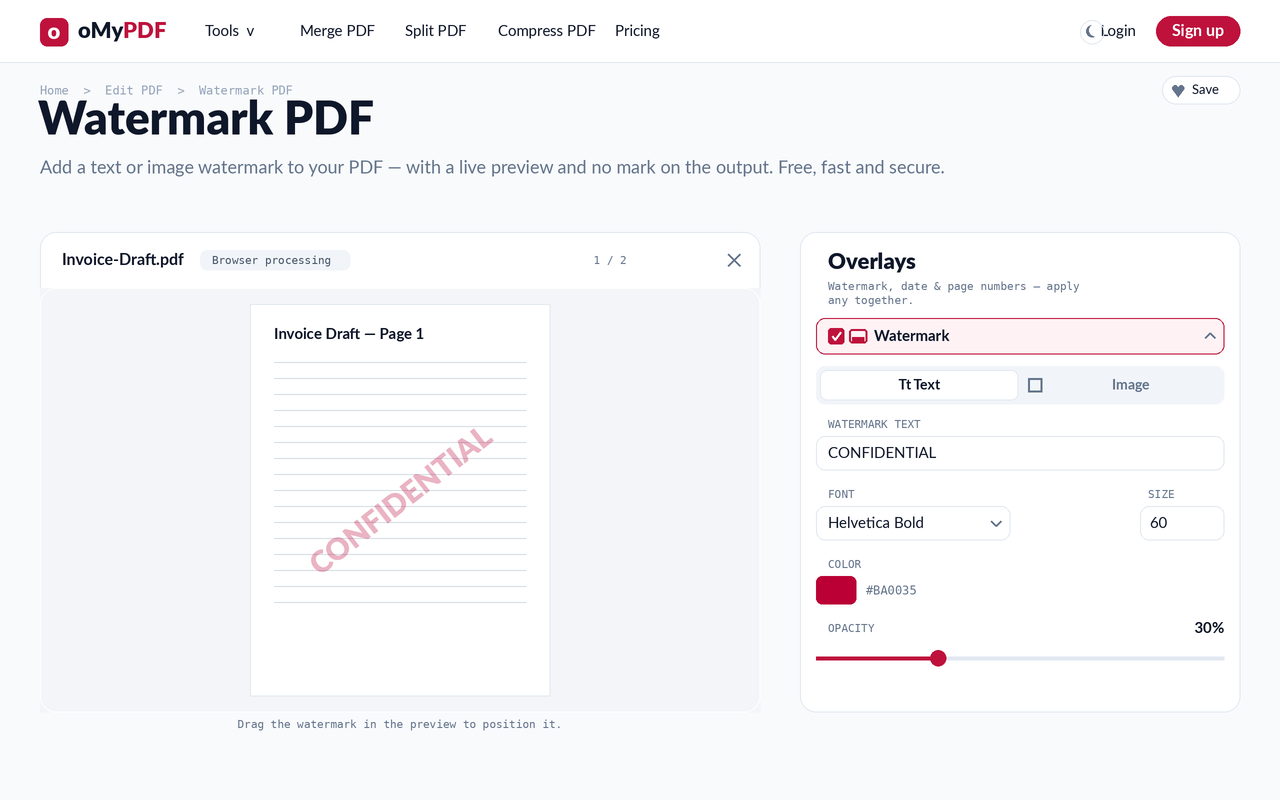
Design your watermark
Your PDF opens with a live preview. In the Overlays panel, keep the Text tab to add a text watermark to your PDF (or switch to Image to stamp a logo), then set the words, font, size, color, and opacity.
- 3
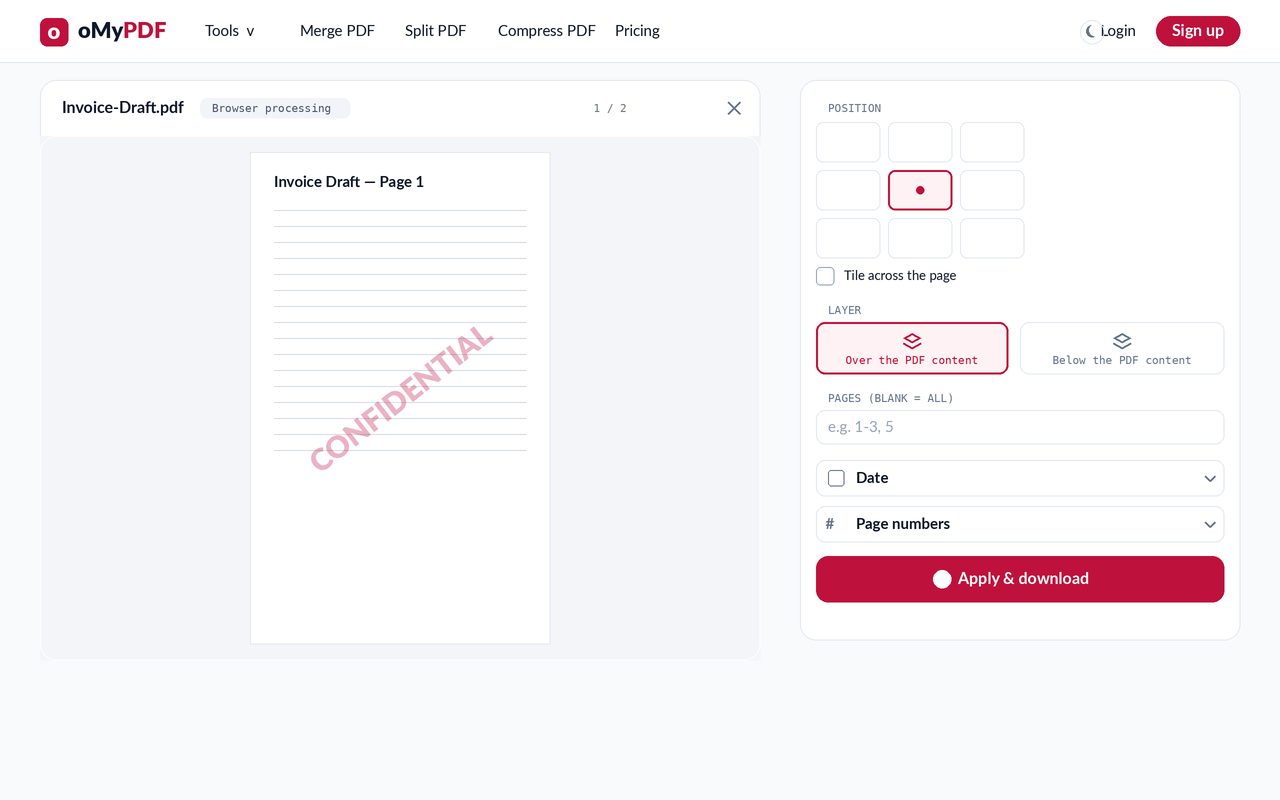
Set position & pages
Pick one of nine positions (or drag the watermark in the preview), choose to tile it across the page, layer it over or below the content, and limit it to specific pages with the Pages field.
- 4
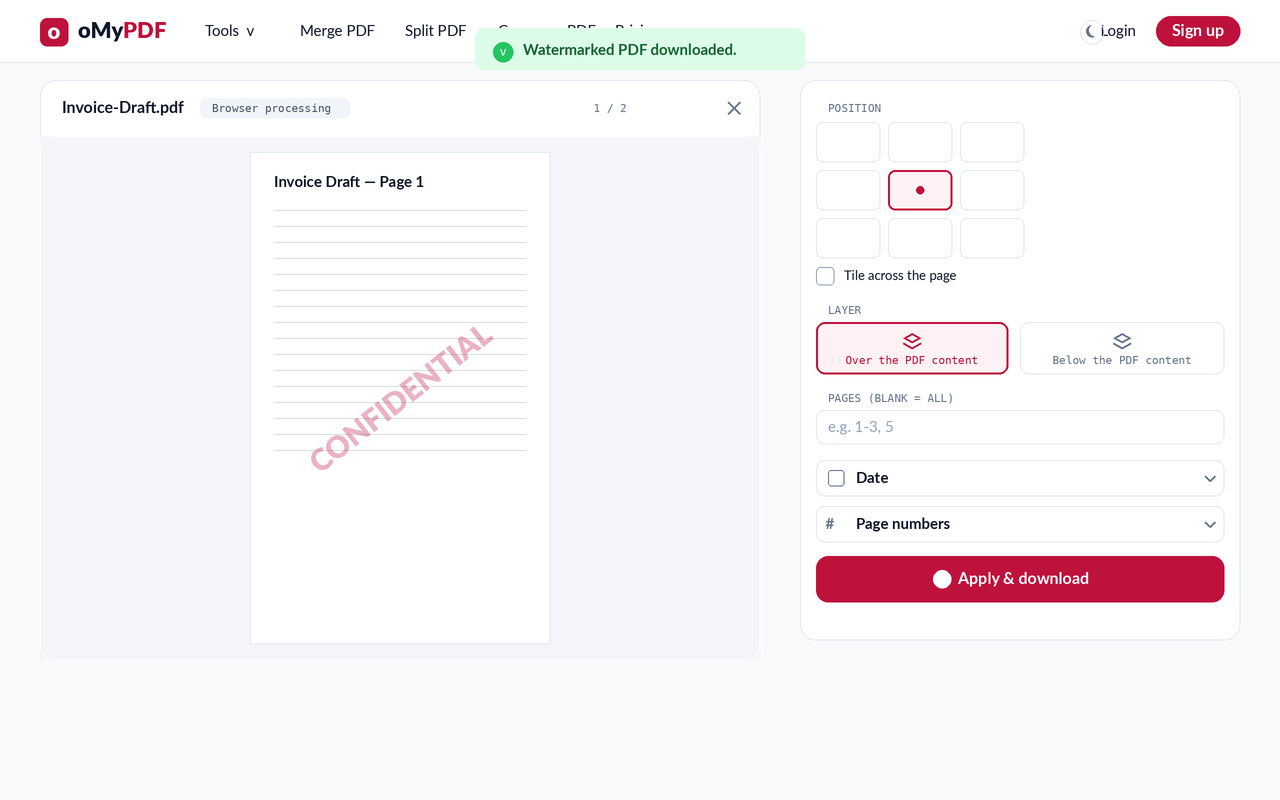
Apply & download
Click Apply & download. Your stamped PDF saves instantly — with no oMyPDF mark added to the output.
Tips
- Text or logo: use the Text tab for a word like “CONFIDENTIAL” or “DRAFT”, or the Image tab to add an image (logo) watermark to your PDF as a PNG or JPG.
- Tile across the page covers every page with a repeating, rotated mark — handy for confidential or draft documents.
- No output watermark: unlike many tools, oMyPDF never stamps its own brand on your file.
- Private by default: add a watermark to a PDF without signup, processed right in your browser for files under 15 MB — nothing is uploaded.
Ready to watermark your PDF?
Free, private, and no sign-up required.